Use Neural Networks in Livebook
Hey folks, today we'll learn how to set up the latest Livebook version 0.8 and use the new Neural Network smart cell. You can find more information about this topic in the announcement here. Let's get started!
Install Livebook 0.8
First, we need to update our local Livebook installation. If you haven't installed Livebook yet, please follow this installation guide.
I typically install and update Livebook as escript like this:
mix do local.rebar --force, local.hex --force
mix escript.install hex livebook

# If you use ASDF, don't forget to reshim Elixir
asdf reshim elixir
Run this code and it will automatically install or upgrade to the lastest Livebook version. You can check our Livebook version with: livebook -v. It should say 0.8.0.
Once you installed Livebook, start it with: livebook server. This will output a URL to localhost:8080 where you can access your Livebook app. Navigate to it and create a new Livebook somewhere in your file system.
The Neural Network Smart Cell
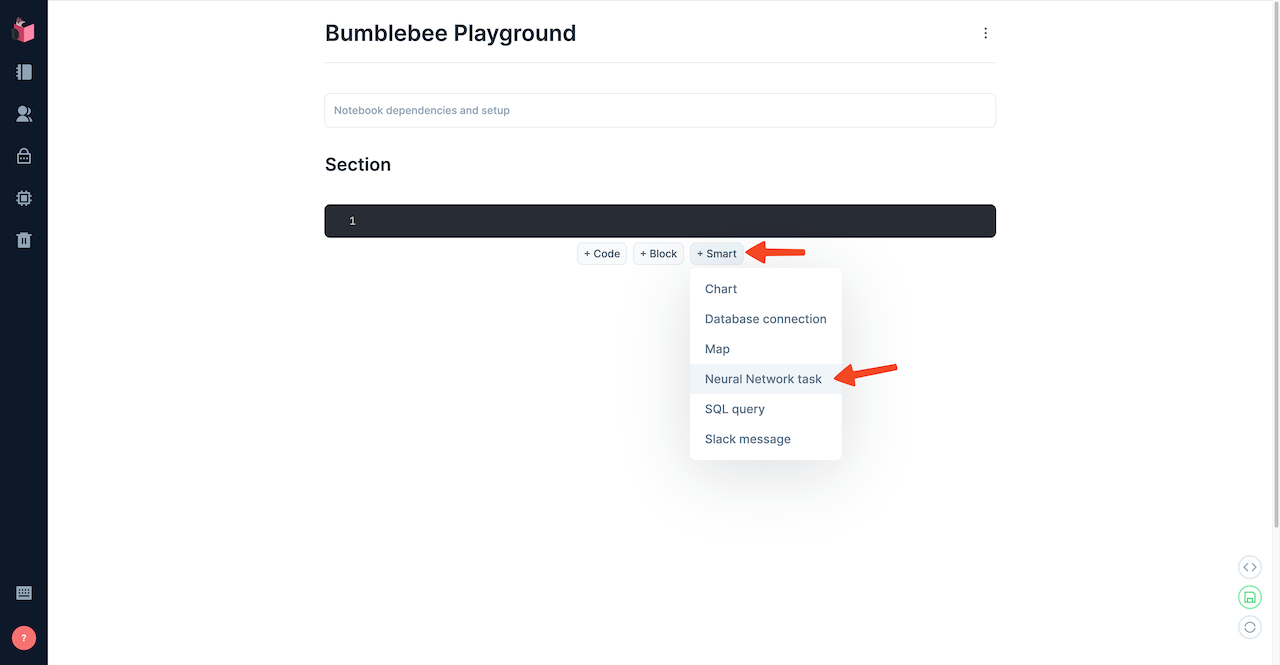
Let's create a new Neural Network smart cell. Click on the + Smart button and choose Neural Network Task like this:
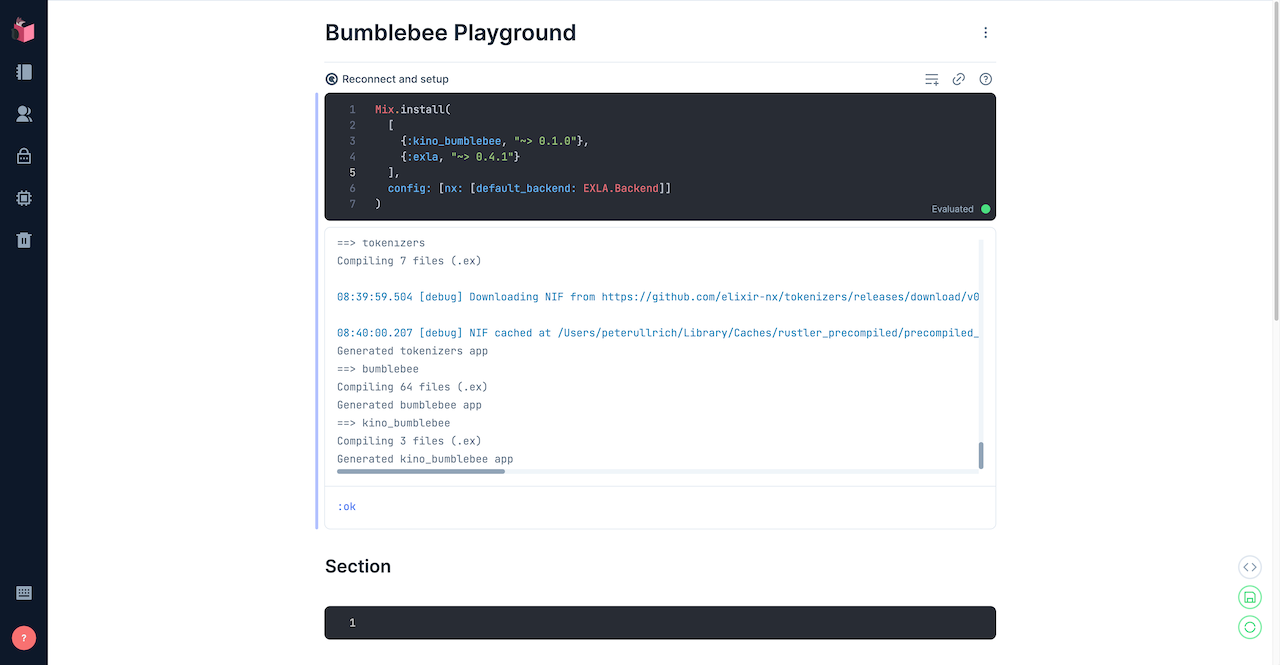
Livebook will ask you whether it should add the required dependencies for the Neural Network smart cell, kino_bumblebee and exla. Choose Add and restart and let Livebook install the dependencies. Since it will download a pre-compiled version of EXLA, it might take a few minutes. The output will look like this:
Set up CUDA
Before we download the Neural Network models, please check whether your computer has a supported NVIDIA graphics card. A graphics card will speed up any calculation significantly.
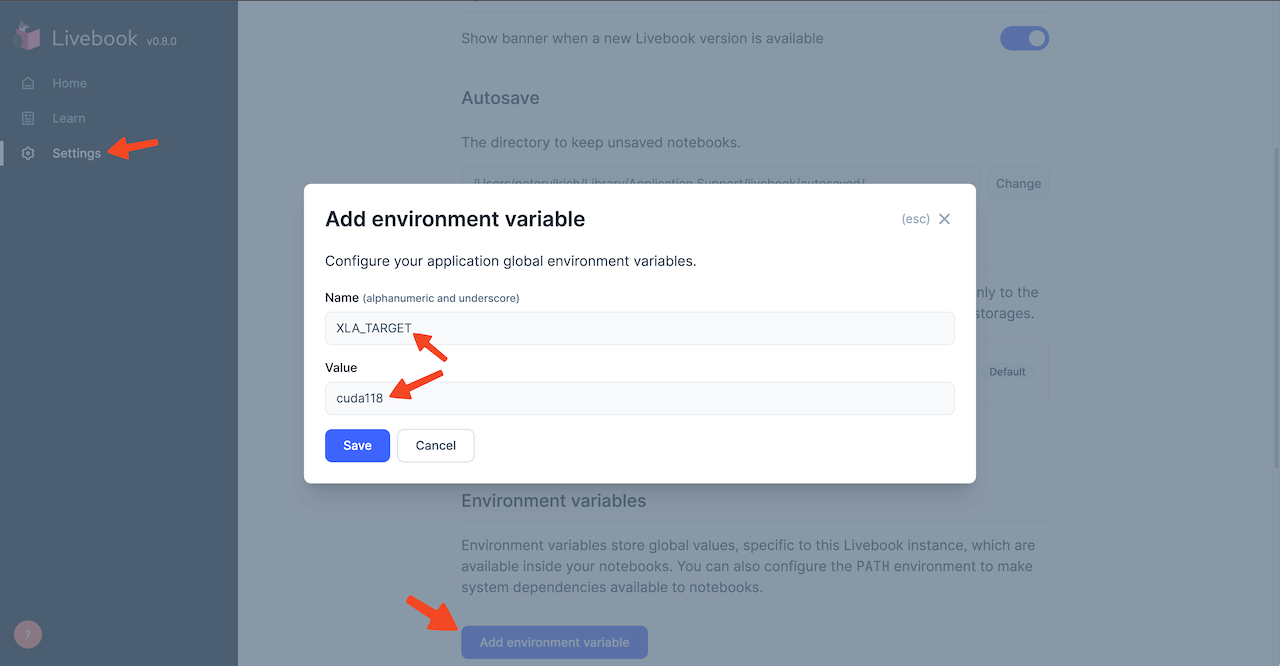
If you do, please follow EXLA's guide for choosing the XLA_TARGET. You will need to install the correct CUDA version for your graphics card. After installing CUDA, set the correct XLA_TARGET environment variable like this:
If you don't have a supported NVIDIA graphics card, don't worry. You can also use the Neural Networks on your CPU, but it will be slow. For example, I use a MacBook with an M1 CPU and it takes around 5 minutes to generate two images with Stable Diffusion. All other tasks, like text generation, finish within a few seconds though. So, it will be slow, but it will work!
Now that we have everything set up, let's start using some Neural Networks!
Text-to-Image
For me, the coolest application of Neural Networks is Text-to-image generation. Bumblebee offers the Stable Diffusion network for this use case. Let's generate some images!
To set it up, first select Task: Text-to-image and Using: Stable Diffusion (v1.4). Then, hit Evaluate above the smart cell. This will download the stable diffusion model from HuggingFace. Since the model is around 6GB, it will take a while. Make yourself a coffee, walk the dog, or - if you live in Germany 🇩🇪 - simply give up.
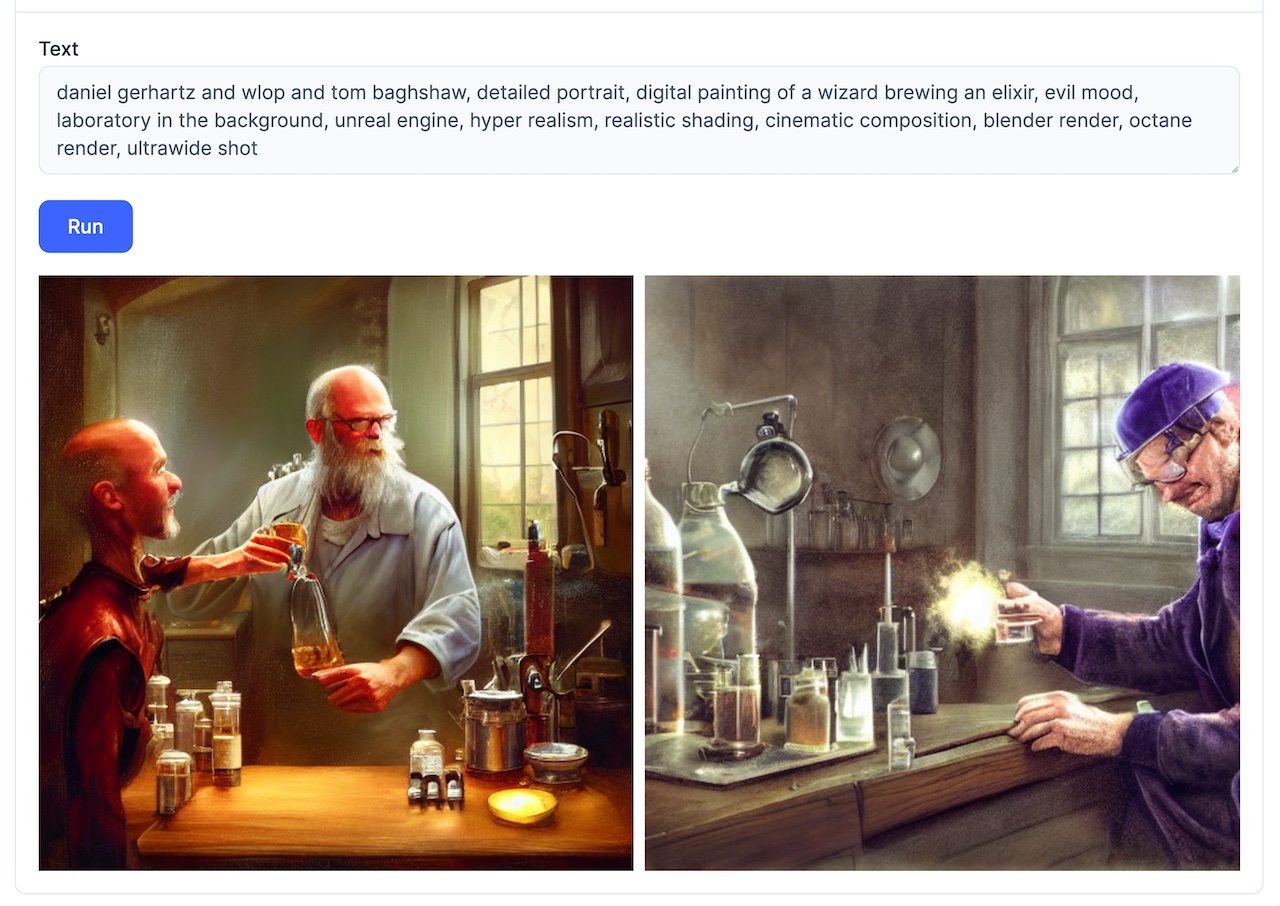
After the download is complete, you can enter a prompt and hit Run. This will take a while! For me, it takes around 5min to generate two images on a 13" MacBook Pro with an M1 Apple Chip and 600% CPU load. So, stare outside your window for a bit and wait for Stable Diffusion to do its magic.
I used lexica.art to find inspiration for a prompt and hit Run. This is the result. Pretty cool, right?
Text Generation
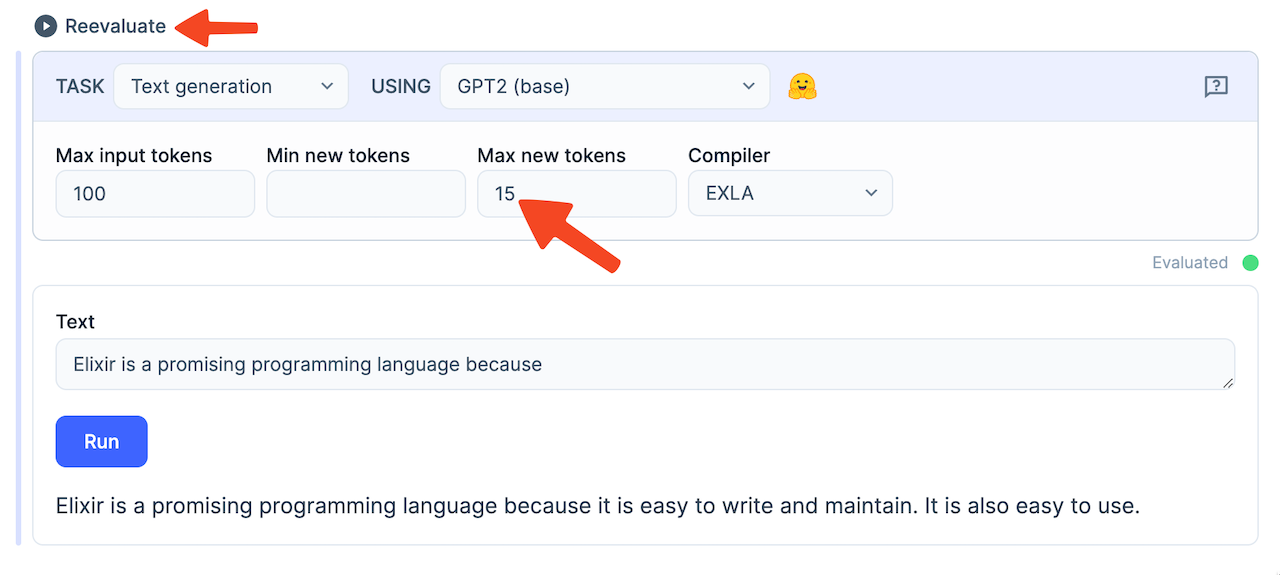
Now, let's generate some text. Change the task of your smart cell to Text generation and choose the GPT2 (base) model. Hit Reevaluate and let Bumblebee download the GPT2 base model. The model is around 600MB, so it will take a few minutes. Once the download is complete, enter some text and hit Run. GPT2 will then add words to your input.
You can define how many words GPT2 should add by increasing the Max new tokens count. Don't forget to hit Reevaluate on the smart cell before hitting Run though! Otherwise, GPT2 will ignore your new config.
Text Classification
Text Classification is useful to calculate the "mood" of a text. Let's try it next.
Change the task of your smart cell to Text classifiation and the model to RoBERTa (BERTweet) - emotion. Hit Evaluate. The chosen model is around 550MB, so again, stare outside your window and wonder whether there's a limit to how much you can love Elixir.
Once the model is available, enter a text you want to classify and hit Run. It will show you how high the text scores on a range of "emotions".
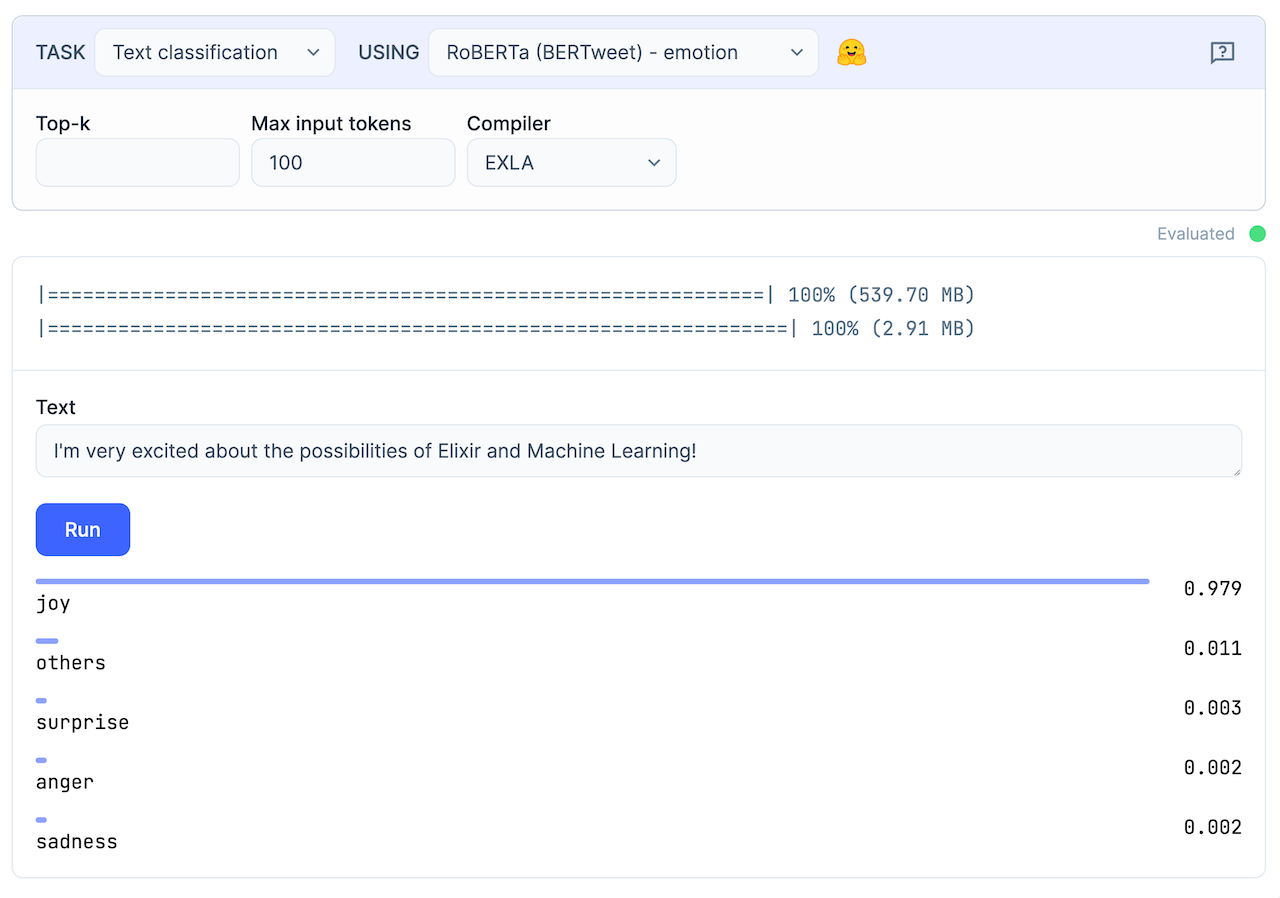
Image Classification
The last task that Bumblee supports is the Image Classification task. Basically, you give it a picture of a dog and it tells you that it's indeed a dog. Amazing.
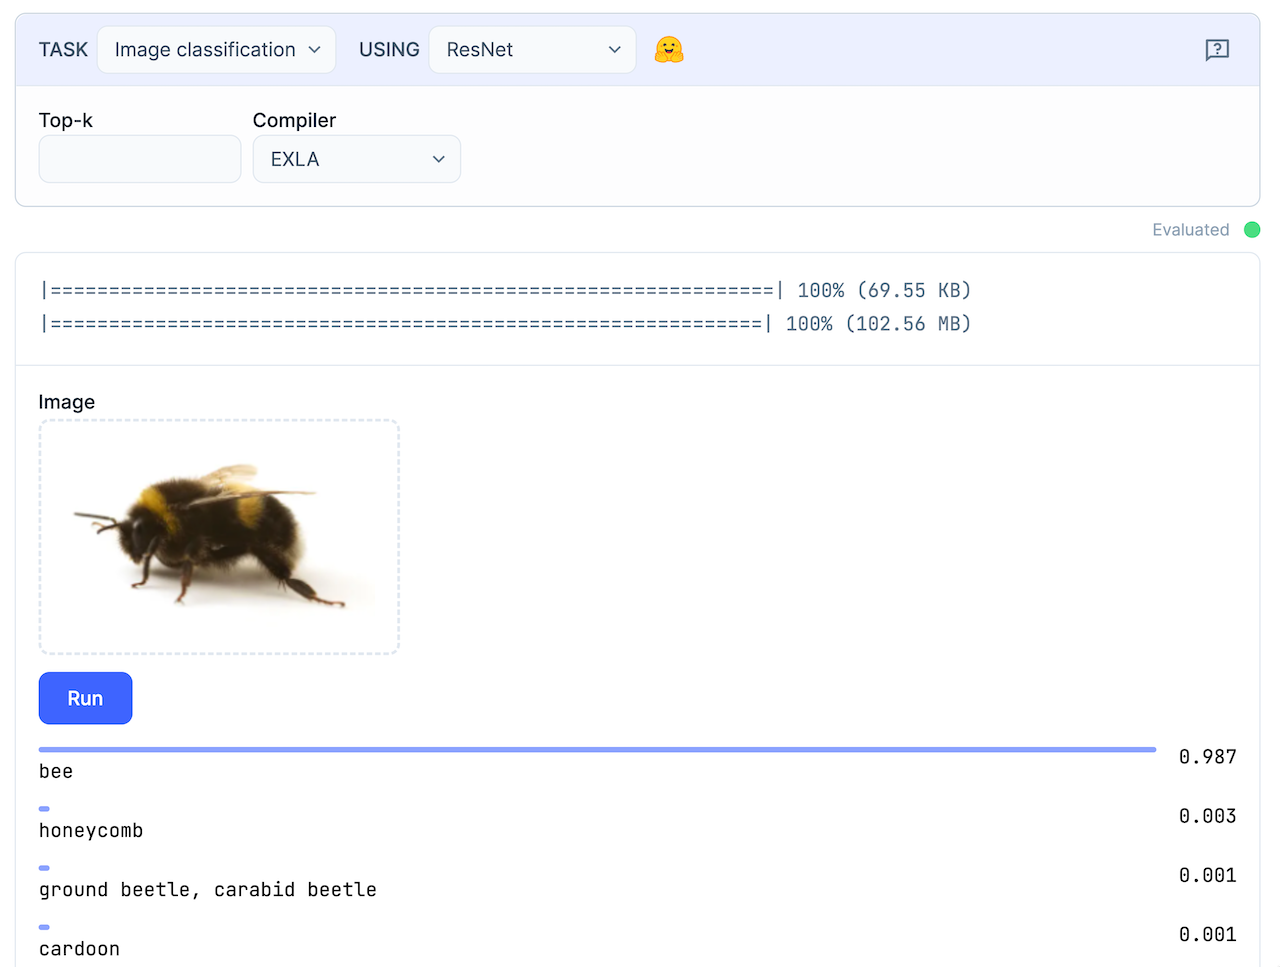
To set it up, select Image Classification and a model like e.g. ResNET. Hit Evaluate. The ResNET model is around 100MB which my Dutch Gigabit internet connection downloads in only a few seconds. I'm not bragging though. I'm just pointing out that this isn't Germany 🇩🇪.
Aaaaanyways. After the download is complete, you can simply drag-n-drop or select an image that you'd like to have classified. I - of course - chose a bumblebee.
Convert to Code
Playing around with the smart cell is great fun, but at one point you might ask yourself how you could integrate the Neural Network into your Phoenix application and make it available to your users. Thankfully, Livebook got you covered!
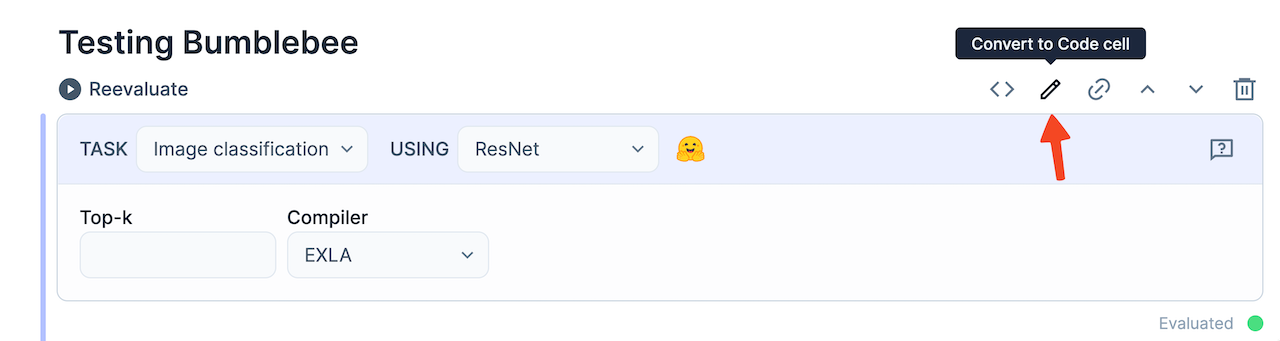
Choose the task and neural network that you'd like to use and hit the Convert to Code cell button above your smart cell. You'll see a warning that this action is irreversible, but that's alright because - of course - we engineers always know exactly what we're doing.
After clicking the Convert to Code cell button, Livebook will show you the raw code of your smart cell. The first part is for setting up the neural network and the second part is for handling user input.
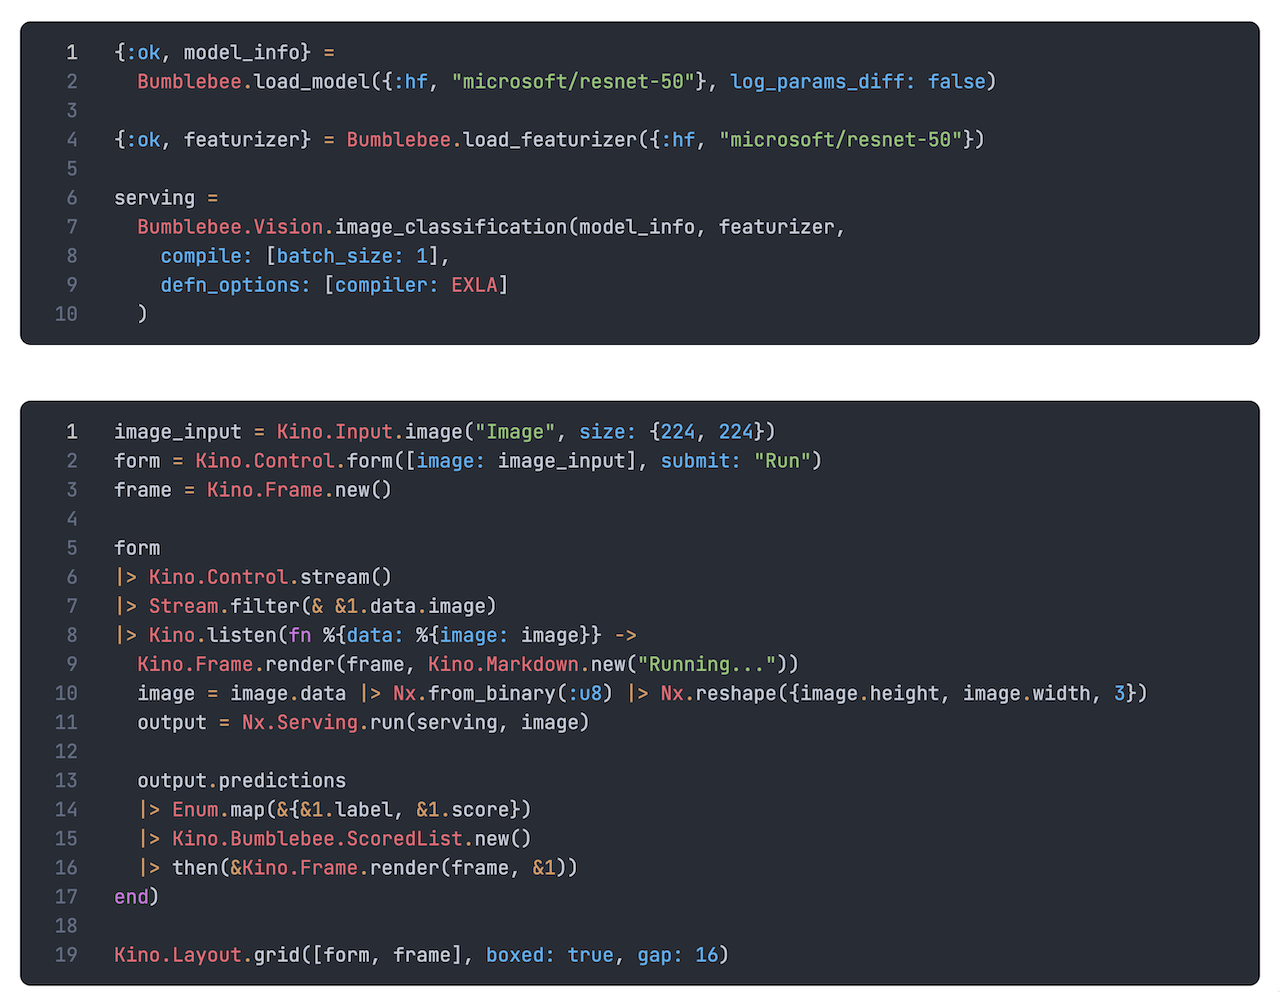
You can now copy this code into your Elixir application and deploy it directly to production! Mind-blowing isn't it?!
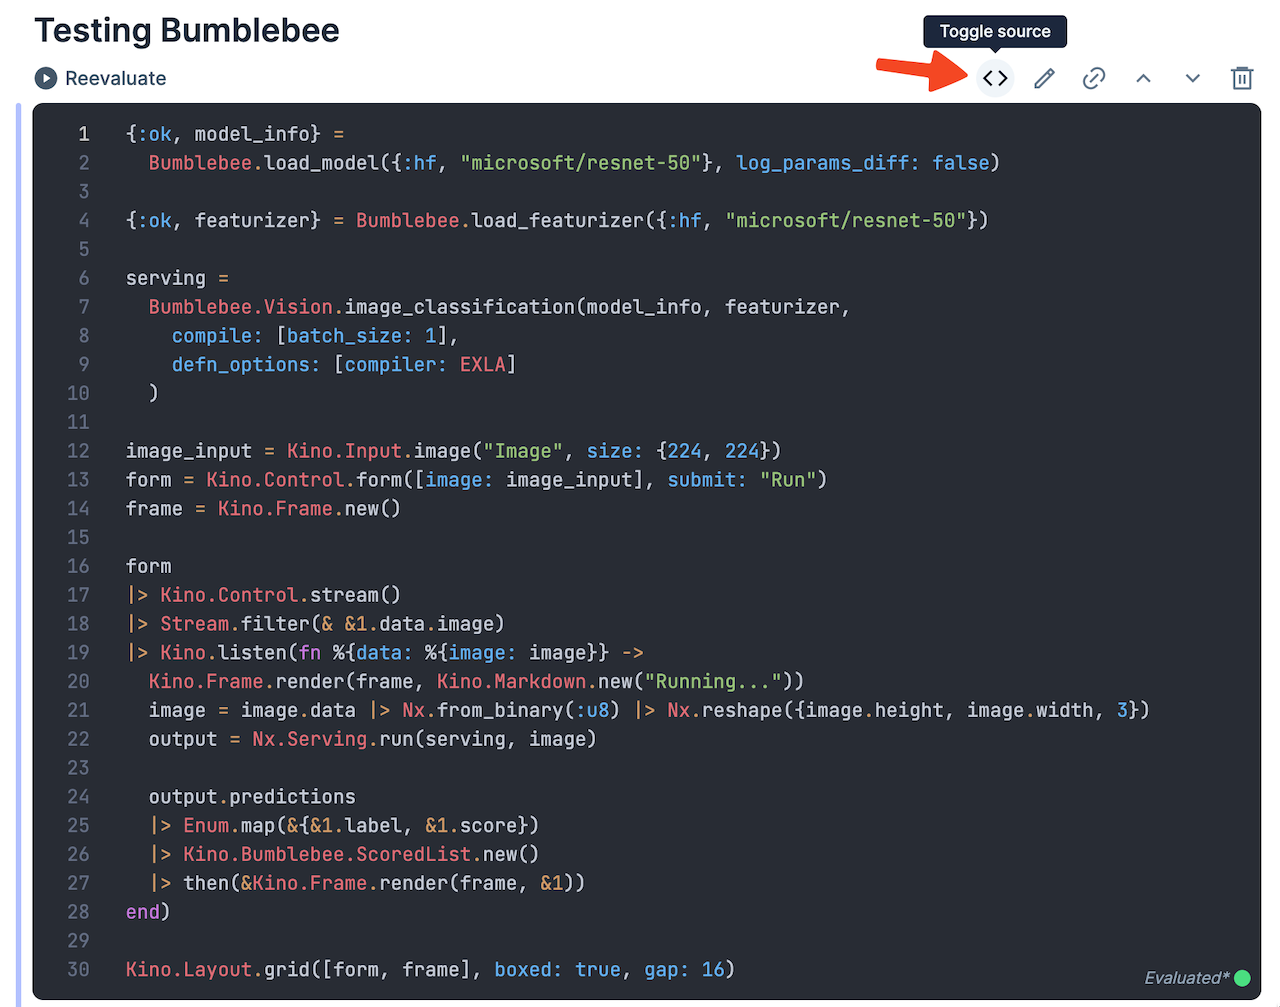
If you don't want to "destroy" your smart cell, you can click Toggle source instead. This will reveal the code of the smart cell, but keep the smart cell intact.
Cleaning up
If you change the task of your smart cell back to e.g. Text-to-image and hit Reevaluate, you'll notice that Livebook doesn't download the 6GB StableDiffusion model again. That's because Bumblebee caches the models. So, it stores the models on your computer and loads them from there instead of downloading the models every time anew.
This is very smart, but can fill up your hard drive pretty quickly if you download a lot of models. You can find and delete the cached neural network models in your user_cache. These are the typical locations for different operation systems:
Linux:   /home/YOUR_NAME/.cache/bumblebee/huggingface
macOS:   /home/YOUR_NAME/Library/Caches/bumblebee/huggingface
Windows: /Users/YOUR_NAME/AppData/Local/bumblebee/Cache/huggingface
Conclusion
And that's it! I hope you liked this article. If you have questions or comments, let's discuss them on BlueSky. Follow me on BlueSky or subscribe to my newsletter below if you want to get notified when I publish the next blog post.